Learn about Vitra toilet cistern parts, their functions, and how to identify and fix common issues. Master Vitra toilet repair with this comprehensive guide.
Understanding Vitra Toilet Cistern Components
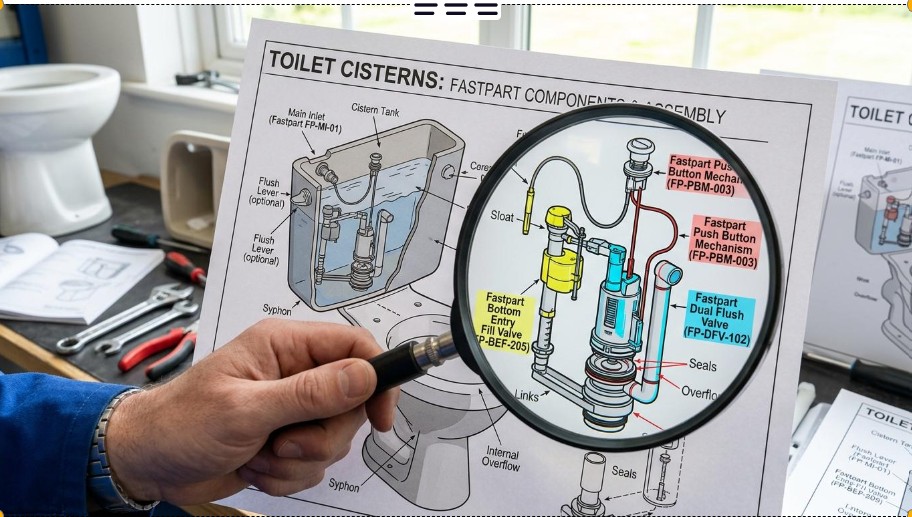
A Vitra toilet cistern may look simple from the outside, but inside it relies on a small group of parts working together: the inlet valve fills the tank, the flush valve releases water into the pan, seals stop leaks, and the button or lever starts the flush. Understanding these Vitra toilet cistern parts makes it easier to diagnose faults before ordering replacements.
1. Turn off the water and open the cistern
Before inspecting any vitra cistern parts, turn off the isolation valve near the toilet or the main water supply. Flush once to empty most of the water from the cistern, then remove the lid carefully. If your toilet has a push-button flush, the button may need to be unscrewed before the lid lifts away.
Keep the lid somewhere safe. Ceramic lids can chip easily, and many are specific to the toilet model.
2. Identify the main cistern components
Look for these common parts:
-
Inlet or fill valve: Controls water entering the cistern after each flush.
-
Flush valve: Releases water from the cistern into the toilet pan.
-
Push button or flush plate: Activates the flush valve.
-
Rubber seals and washers: Prevent water from leaking around joints.
-
Overflow system: Directs excess water safely if the cistern overfills.
-
Float mechanism: Tells the inlet valve when to stop filling.
When searching for Vitra toilet cistern parts, compare the shape, size, fitting points, and product markings rather than relying on appearance alone.
3. Match symptoms to likely faults
If the toilet keeps running into the pan, the flush valve seal may be worn, dirty, or not seating correctly. If the cistern fills slowly, the inlet valve could be blocked by debris or limescale. If water rises too high, the float may need adjustment or the inlet valve may not be shutting off.
For a weak flush, check whether the flush valve is opening fully and whether the cistern is filling to the correct level. For water around the base of the cistern, inspect close-coupling washers, bolts, and seals.
4. Remove and inspect the faulty part
Take photos before removing anything. This helps when reassembling the mechanism or comparing replacement vitra cistern parts online. Look for:
-
Cracked plastic
-
Perished rubber seals
-
Limescale build-up
-
Loose clips or threaded fittings
-
Part numbers stamped on the component
-
Clean light limescale first, then test again. Not every Vitra toilet repair requires a full replacement part.
5. Choose the correct replacement
Use the toilet model, part number, and component dimensions to narrow your search. A specialist source such as Toilet Repair Spare Parts lists bathroom spare parts and Vitra-related items, including examples like a Vitra Main Unit Flush Pipe Bend and other Vitra spares. (toiletrepairspareparts.co.uk)
Also remember that not every bathroom issue is inside the cistern. If the seat is the problem, you may come across items such as the Vitra NEST/RETRO soft close toilet seat and cover, listed with SKU 74-003-009; always check compatibility before ordering. (toiletrepairspareparts.co.uk)
6. Refit, test, and check for leaks
-
Install the replacement part according to its fitting style, reconnect the water, and let the cistern refill. Flush several times while checking around the valve, pipe connections, and seals. If the water level is too high or low, adjust the float gradually.
A careful inspection, accurate part matching, and patient testing will solve many Vitra toilet repair problems without replacing the entire toilet.